Category: Programming

BizzasCPU springs to life v2.0

After two years of developing and simulating, BizzasCPU today took the step into actual hardware. The first ever upload into an actual FPGA started the parade of blinking LEDs and established that it works quite well. In fact the first run was so fast that it needed to be slowed down by a factor of 10,000 to be able to verify without a doubt that it is fully functional and operates as expected.

The host FPGA was a Terasic DE10-Nano development board and the operating frequency was 12.5MHz. The frequency however can most likely be bumped up significantly, if needed. The BizzasCPU design has much higher MIPS per Clock compared to a 6502 or Z80, but instruction complexity is somewhere inbetween, being more versatile than 6502, but less than a Z80.

Now follows the need for a proper assembler and more IO to make it more fun to play around with. Just 8 LEDs blinking is not the most inspiring.

Of course it will now be fun to run around bragging about my very own CPU design. Future will tell if anyone ever notices.
BizzasCPU springs to life

Around the beginning of September, I resumed work on my old CPU project that had been collecting dust on github. After about 10 days work, I reached a point where I started implementing the logic for instruction execution.

The more simple instructions were all added and verified quite quickly. Last ones to be implemented were JMP and memory access instructions. JMP instructions actually turned out to be extraordinarily simple logic.

It currently compiles into less than 300 logic elements, so it is a very simple (8-bit data, 16-bit address) CPU design.

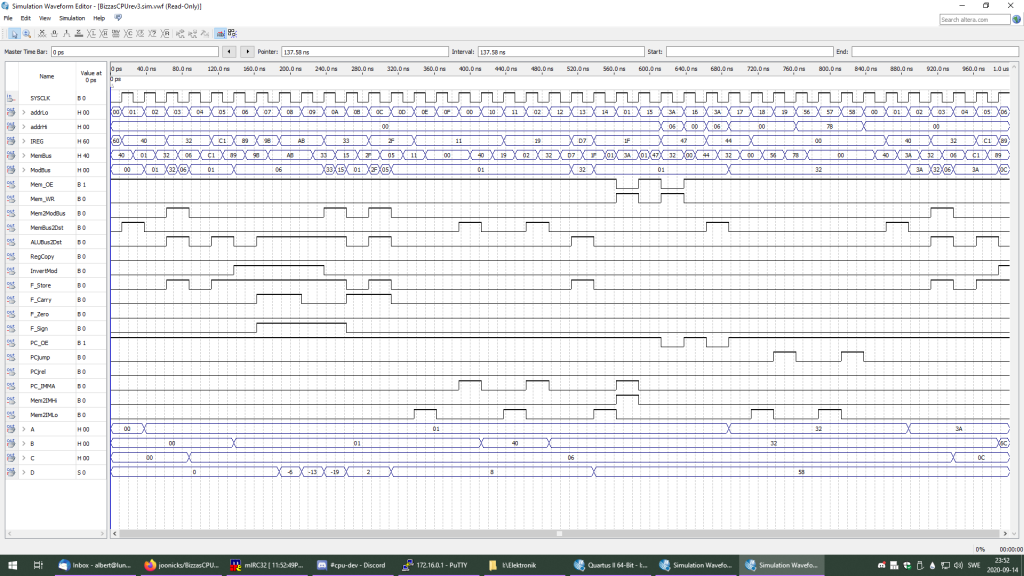
Here is what it looks like running in simulation software:

It still hasnt been tested on FPGA hardware, hopefully that day will come before more years pass. I just ordered a Terasic DE10-Nano which has more test hardware built onto it, which should make debugging easier.

For more details on BizzasCPU, check out the github repository: https://github.com/joonicks/BizzasCPU

Working house monitor

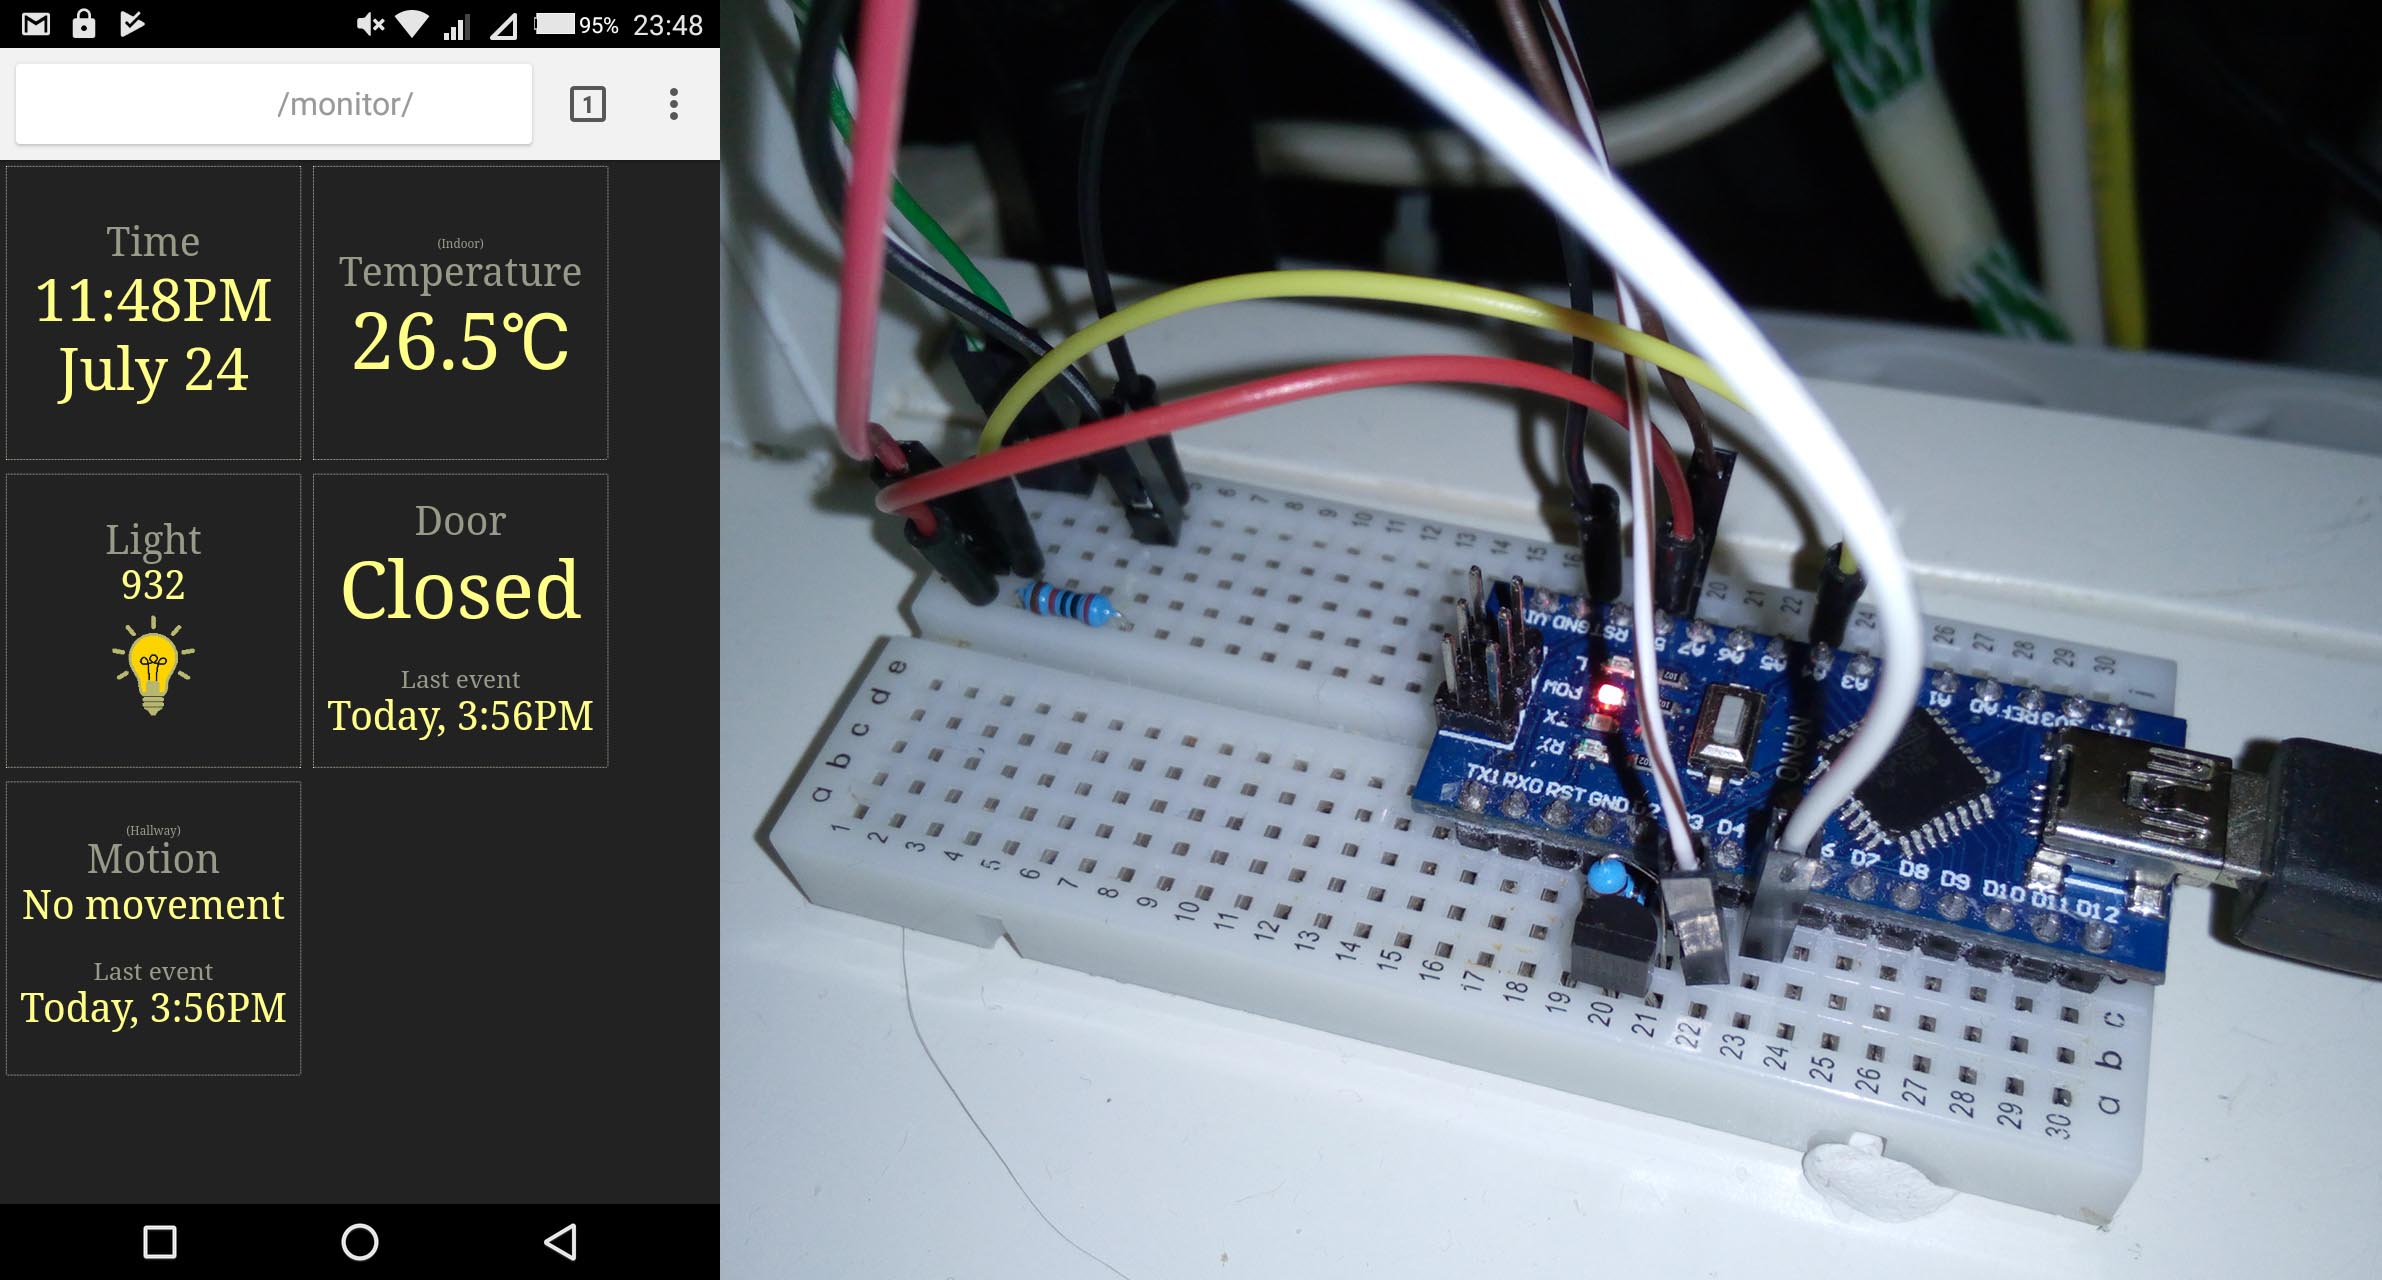
For some time now my house monitor circuit has been working and logging data as well as providing a web interface where the current status of the sensors can be seen. Not that many sensors right now but;

  • Door sensor. Simple aluminium foil pads in the doorframe wired such that if the door is closed, the input pin is directly connected to ground. If the door opens, the connection is broken and through a 5k resistor, the pin is pulled up to +5V.
  • Motion sensor pointed at my hallway and door. To see when people come and go, as well as seeing when I visit the toilet and such… there is no such thing as too much information…
  • Photoresistor underneath my desk lamp. Any time Im at my desk, my desk lamp is lit, so its an indication of wether Im at my desk or not.
  • Dallas 18B20 temperature sensor. Next to my desk (but one shelf up above a server so its constantly reading a bit hotter than the rest of the room).

In the future I hope to expand the system with wires to my window for reading outside temperature and light.

And I have to work on making graphs for trends over the course of a day, month or year for temperature and light sensor readings.

housemonitor1

Time to learn

Now the time has come for me to dig up an old corpse and give it new life. The corpse in question is twsinit from Bizarre Sources, a project where I once crammed the whole init program in Linux into 1 page of memory.

You see, any program that runs has memory allocated to it for things like code, data, stack, environment, etc. The normal size for init in Linux is about 1-1.5MB in memory. But the init process really only needs to do one job; it inherits all orphan processes and thus has to take care of its “children” terminating. Otherwise they turn into zombie processes.

To do that job you really dont need 1MB of code. So I wrote a program from scratch called twsinit that can do the job of starting the system and buring zombie processes. The last official release did the job in two pages of memory, 1 page code and 1 page stack. But another version after that did away with the stack page as well.

So right now Im digging around in my old code, relearning how it works, and then I need to move on to learning ARM assembly and calling conventions in ARM Linux. Shouldnt be too difficult.